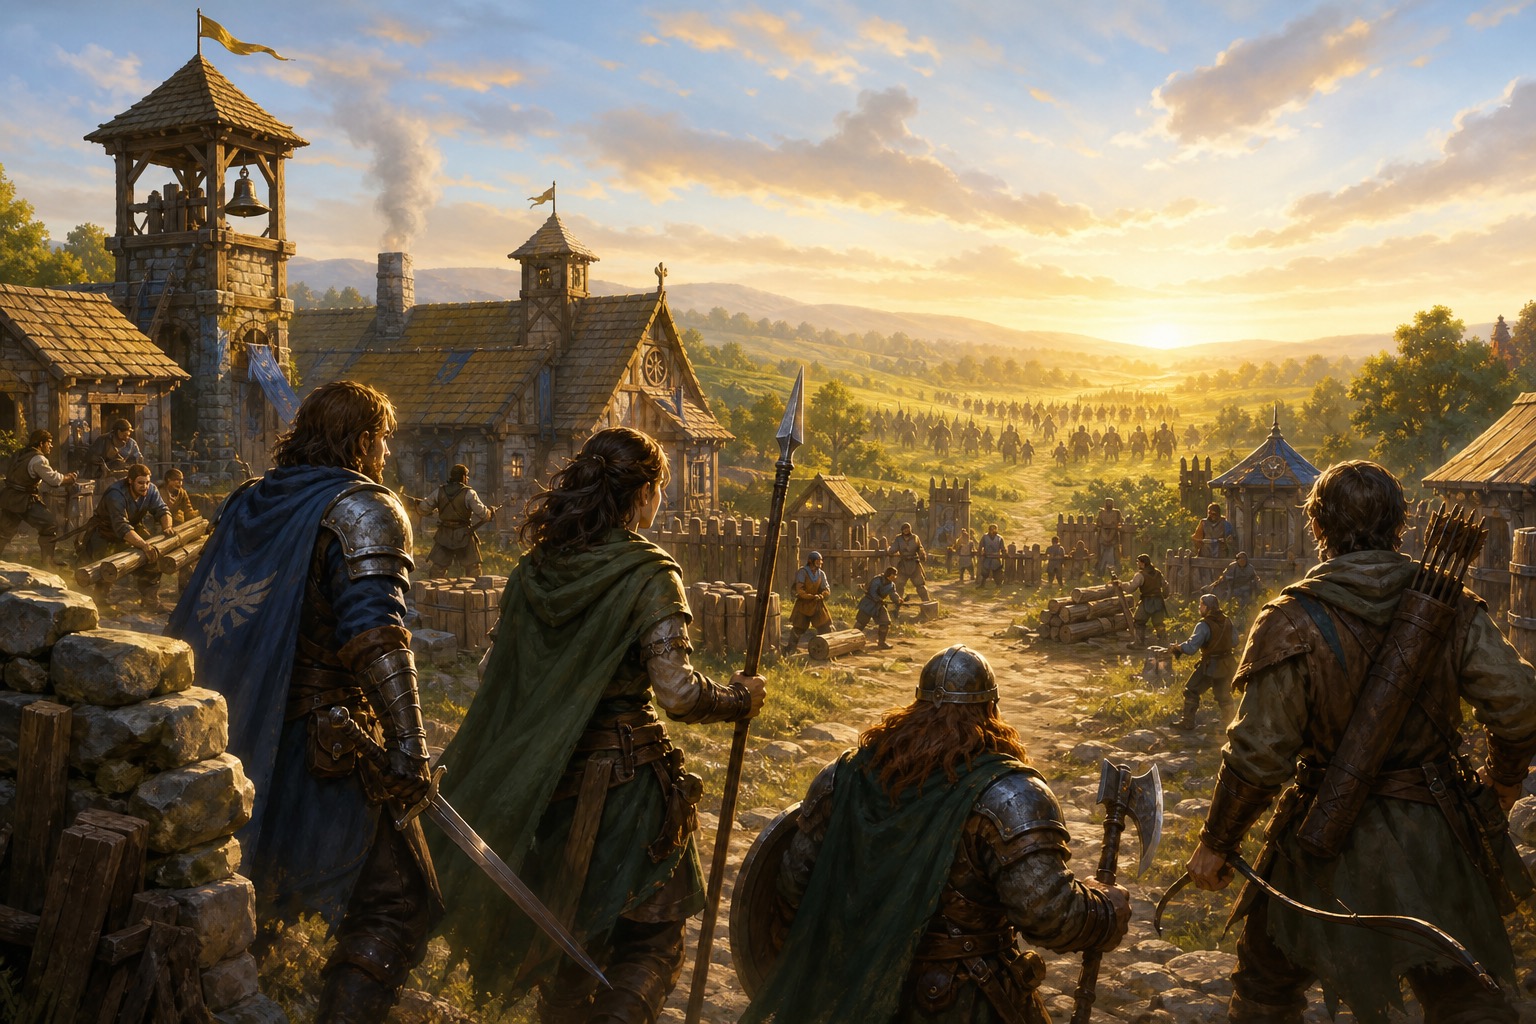
The Village Must Stand is a cooperative and solo village-defense game, inspired by the fast Song of Blades and Heroes engine. It is a complete game: you need no other rulebook to play it.
This book holds every core rule — activation, movement, combat, morale, magic, the village, and the wave engine — plus the traits and spells the supplied profiles use (§8). Two companions carry the rest: the Hero Compendium gives each hero's profile, lore, and unique signature ability, and the Bestiary & Wave Generator gives the enemy roster and their Alpha Rules. A signature ability is printed with its hero rather than repeated here.
The book has three parts. Part One — Learn the Game (Ch. I–III) teaches the rules every model uses: read it once before your first game. Part Two — Play the Game (Ch. IV–VII) follows the order of play at the table: set up, start a wave, fight it, end it. Part Three — Reference (Ch. VIII) holds the trait, spell, and glossary tables for lookup during play.
The Village Must Stand
Two to four heroes defend five village buildings from a series of enemy waves. The Town Hall must survive. If it is destroyed, the players lose immediately. If it remains standing when the final wave ends, the players win. For a harder game, the players also lose if every hero is Defeated at the same time; Defenseless heroes do not trigger this rule.
Every game follows the same loop:
- Start a wave (Ch. V): calculate its budget, build Enemy Groups, resolve wave-start abilities, and deploy both sides.
- Fight the wave (Ch. VI): heroes and enemies take alternating turns until no enemy remains.
- End the wave (Ch. VII): resolve fires, gain Supplies, place an Opportunity, then repair, upgrade, and prepare defenses in the Council Phase.
Sequence of Play
Components and Profiles
You need 2–4 hero models, enemy models from the Bestiary, five village buildings, terrain, a ruler marked at 3", 6", and 9", at least three D6s, and tokens for Integrity, Supplies, fire, Defenseless models, Opportunities, Barricades, Traps, and Wounds.
Use a Short measure of 3", Medium measure of 6", and Long measure of 9". Measure from any point of one base to any point of another base. A profile gives a model's Quality (Q), Combat (C), traits, and sometimes a ranged attack, spell, or signature ability.
Quality is the number a die must equal or exceed to succeed; lower is better. A natural 1 always fails and a natural 6 always succeeds. Combat is added to a combat die. Unless a trait says otherwise, a model has Medium movement.
Rules terms are introduced where they first matter. For lookup during play, use the Glossary in §8.3.
Core Gameplay
3.1 Rounds, turns, and activation
A round contains one hero turn and one enemy turn. At the start of a side's turn, all of its models become Active. The side then activates its models one at a time:
- Nominate one Active model — or end the turn instead.
- Roll one, two, or three activation dice and compare each die with the model's Quality. Each success gives one action.
- Resolve the model's actions, then mark it Activated.
- Continue with another Active model — unless the roll caused a turnover, which ends the side's turn.
| Activation result | Effect |
|---|---|
| No successes, fewer than two failures | No action; choose another Active model. |
| One or more successes, fewer than two failures | Take one action per success; then choose another Active model. |
| At least one success and two failures | Take one action per success; the side's turn ends. |
| Two or three failures and no success | No action; the side's turn ends. |
A model that fails one activation die without turnover is still Active and may be nominated again later that turn. A Hero treats one activation die as an automatic success; it also automatically passes a one-die Quality check.
Example — activation: A Q3+ hero rolls two dice: 4 and 1. The 4 succeeds and the 1 fails, so the hero has one action and the turn continues. If the dice were 2 and 1, the hero would take no action and the hero turn would end.
Group activation. Up to five models within Long distance of a friendly Leader, and within Long of each other, may activate together on a single roll. Roll once using the worst Quality in the group; every model in it takes the same number of actions and must use them in the same way — typically all moving in roughly the same direction. A turnover from a group roll ends the side's turn as normal. Enemy Groups always activate this way; see §6.2.
Tasks. Some jobs take more than one action: defusing a trap, pulling a comrade free, breaking a harpoon loose. These are written as a 1-, 2-, or 3-action Task. A model performs a Task by spending actions on it; the actions accumulate and need not all come from the same turn, and the Task is complete once the stated number has been spent. A model that leaves, is Defeated, or is interrupted before finishing loses the accumulated actions unless the rule says otherwise. Unless a rule says so, two models cannot pool actions on the same Task.
3.2 Actions
Actions may be taken in any order. A model may make only one attack—melee or ranged—per turn unless a trait says otherwise.
| Action | Cost | Rule |
|---|---|---|
| Move | 1 action | Move up to its movement band. |
| Melee attack | 1 action | Attack one Engaged enemy. |
| Power Blow | 2 actions | Melee attack; target has −1 Combat. |
| Ranged attack | 1 action | Attack a legal visible target. |
| Aimed Shot | 2 actions | Ranged attack; target has −1 Combat. |
| Stand | 1 action | Remove Defenseless. |
| Claim Opportunity / escort villager | 1 action | Use the relevant rule in §6.1. |
| Cast a spell | 1–3 actions | Use §3.7. |
| Break Entangle or Transfix | 2 actions | End that condition. |
3.3 Movement, terrain, and engagement
Move in a straight line. A model may move less than its full distance. Difficult terrain and a linear obstacle reduce movement one band (Long to Medium, Medium to Short); a Short-move model needs two actions to cross it. A model may always spend one action to take a one-base-width step.
Models may pass through friendly bases only if they can clear them, and never through an enemy. Movement stops on contact with an Active enemy; the models become Engaged. Defenseless enemies do not stop movement. A model may cross low obstacles using the linear-obstacle rule; terrain higher than half its height is impassable unless players agree it can be climbed before play.
A model may leave melee freely only if every enemy it leaves is Defenseless, Entangled, or Transfixed. Otherwise, every adjacent enemy that lacks Free Disengage makes one Free Hack against it. If the leaving model survives, it completes its move. Mounted models have Free Disengage against non-Mounted, non-Flying enemies; Flying models have it against non-Flying enemies.
A Free Hack is an attack that carries no risk for the attacker. Resolve it as a normal melee attack, except that the target makes a defensive roll: it rolls its D6 and adds Combat and modifiers as usual, and can stop the attacker from winning, but can never inflict a result of its own. The worst outcome for a model making a Free Hack is that nothing happens.
3.4 Melee
An Engaged model may spend an action to attack one adjacent enemy. Resolve every melee attack the same way:
- Declare the attacker and one adjacent target.
- Work out each side's modifiers from the table below.
- Roll one D6 for each model and add its Combat and modifiers.
- Compare the totals. The higher total wins; a tie has no effect.
- Look at the winner's combat die and apply the result below.
Melee is simultaneous. Both models roll, whichever one attacked, and either may be hurt. A model that attacks and loses suffers the result itself, exactly as though it had been the one attacked. Spending the action buys the chance to hurt the enemy, not safety from being hurt. The only exception is a Free Hack, where the target rolls defensively and cannot hurt the attacker.
The combat die is the number showing on the D6 itself, before Combat and modifiers are added — not the final total. A model that wins with a total of 9 from a natural roll of 3 has an odd combat die.
| Winner's total compared with loser | Result |
|---|---|
| Tie | No effect. |
| Winner higher, but less than double | Loser Recoils if the winner's combat die is odd; loser becomes Defenseless if it is even. |
| Winner at least double | Loser is Defeated. |
| Winner at least triple | Loser is Defeated by a Gruesome Kill. |
Recoiling moves a model one base width directly away from the attacker; its controller chooses between equally legal directions. If there is no room to recoil — because of terrain, a table edge, or other models — it becomes Defenseless instead. Recoiling never moves a model through another model or into impassable terrain, and a model that recoils out of melee is no longer Engaged.
A Defenseless model may still fight, but attacks against it are Lethal: any loss defeats it. A Defenseless model is attacked at +2 Combat. A Power Blow, a Defenseless or Transfixed target, and a Lethal attack each defeat the target on any loss; they do not change an otherwise higher multiplier result.
When a model is Engaged with several enemies, resolve each attack separately, one at a time, applying the outnumbering modifier below. Apply each result before rolling the next attack: a model that is Defeated by the first attacker does not get to fight the second.
An attacker that began the turn fully hidden from its target — behind blocking terrain or otherwise out of its line of sight — has the Ambush bonus on its attack.
| Common melee modifier | Modifier |
|---|---|
| Each additional adjacent enemy after the first | −1 Combat to the outnumbered model |
| Target is Defenseless or Transfixed | +2 Combat; attack is Lethal |
| Power Blow | −1 Combat to target |
| Ambush — attacker began the turn fully hidden | +1 Combat |
| Big/Huge attacker versus smaller target | +1 Combat |
- Example — the attacker wins
- A C4 hero makes a Power Blow against a C3 raider. The hero rolls 4 (total 8); the raider rolls 3, reduced to C2 (total 5). The hero wins but does not double 5, so the raider becomes Defenseless because the hero's combat die — the 4 — is even.
- Example — the attacker loses
- The same C4 hero attacks an orc warrior. The hero rolls 1 (total 5); the orc has C3 and rolls 5 (total 8). The orc wins, so the hero suffers the result even though the hero attacked. The orc's combat die is 5, an odd number, so the hero Recoils one base width away.
- Example — the combat die is not the total
- A C5 boss rolls 2 against a C1 mob that rolls 1. The boss totals 7 against 2 — more than triple, so the mob suffers a Gruesome Kill. The boss's low roll of 2 does not matter: the multiplier decides whether the target is Defeated, and the combat die only chooses between Recoil and Defenseless.
3.5 Ranged attacks
A shooter needs line of sight and may not be Engaged. It may not target an enemy Engaged with another model. The closest legal visible enemy must be targeted, except that the shooter may ignore an enemy that is Defenseless, in cover, hidden, or worth less than half the shooter's profile cost; it may always choose a Big or Huge target. Agree which terrain blocks line of sight before play. Visible partial obstruction is Cover.
Roll a D6 for shooter and target, adding Combat and modifiers. The target makes a defensive roll (§3.3): it can stop the shooter from winning but can never hurt the shooter back. A tie has no effect. If the shooter wins, read the shooter's combat die and resolve Recoil, Defenseless, Defeated, and Gruesome Kill exactly as in melee. Shooting a Defenseless or Transfixed target is Lethal. A natural 1 on a shooter's combat die requires another D6; on a second 1, its ranged weapon cannot make further ranged attacks this game.
Concentrated Shooting. Two or more models that are all Active, all in range and line of sight of the same target, and all able to shoot may fire together as a single attack. Roll once for the group using the best shooter's Combat, and apply −1 Combat to the target for each shooter after the first. Resolve the result once. A model that takes part has shot for the turn. Effects that trigger per hit, such as Poison, are checked once per shooter, but the target still suffers no more than the normal maximum from that effect in a turn.
| Ranged modifier | Modifier |
|---|---|
| Target in Cover | −1 Combat to shooter |
| At twice normal range | −2 Combat to shooter |
| At triple normal range | −4 Combat to shooter |
| Target is Undead | −2 Combat to shooter |
| Target is Big or Huge | +1 Combat to shooter |
| Target is Transfixed | +2 Combat to shooter; Lethal |
| Good Shot | +1 Combat to shooter |
Short Bows have Medium range and gain +1 Combat within Short. Longbows have Long range and use +1 / 0 / −2 Combat at one / two / three Long measures. Javelins have Short range; after moving closer to a target, one may be thrown for free. A Javelin is exhausted on a natural 1. Throw Rock has Medium range.
Example — shooting: A C3 Marksman with Good Shot fires at a C2 enemy in Cover. He rolls 5: 3 + 5 + 1 − 1 = 8. The target rolls 4 for 6. The target becomes Defenseless because the shooter's die was even.
3.6 Morale and states
A morale check is a three-die Quality roll. On one failure, the model moves one full movement band toward the nearest table edge; on two failures, it moves two bands; on three failures, it Flees and is removed. Fleeing movement uses the shortest legal route and terrain penalties. If it begins this movement Engaged, each enemy it leaves makes a Lethal Free Hack.
A model checks morale when:
- it is charged by a model with Terror;
- a Gruesome Kill occurs within Long of it;
- its Leader is Defeated;
- more than half of its side's starting models have been Defeated or Fled.
Special cases:
- Fearless, Artificial, and Undead models ignore Terror and Gruesome-Kill checks.
- An Undead model that rolls two or three failures is Defeated instead of moving.
- A Defenseless model first spends each compelled movement standing; a Defenseless model that fails morale while Engaged is Defeated.
- A Transfixed model that fails morale is Defeated.
For an Enemy Group, check only Terror and Gruesome Kills. After compelled morale movement, the model resumes its Behaviour when it next activates. A Raider that reaches an edge because of morale has Fled; it has not looted a building. Enemy models leaving by morale count toward ending the wave.
3.7 Magic and conditions
A model with one or more named spells on its profile is a Spell-caster. It must declare spellcasting before rolling activation dice. Its successes are actions and may be spent as spell Power 1–3; Power 1/2/3 has Short/Medium/Long range. It cannot cast while Engaged or without line of sight. On three failed dice, it is out of power for the rest of the wave. Unless a spell below says otherwise, a spell used as a ranged attack uses Combat equal to its Power and follows ranged-attack rules.
- Transfix
- Spend 1–3 actions to target a visible model at the matching range. The target rolls one Quality die per Power; any failure Transfixes it. A Transfixed model cannot move, is attacked at +2 and Lethally, and spends two actions to break free. It immediately breaks free if its caster is Defeated.
- Entangled
- An Entangled model cannot move. It spends two actions to break free; it is attacked at +1 Combat. Ensnare ends if the ensnarer Recoils or is Defeated.
Named spells used by the supplied profiles are resolved in the Spells reference (§8.2). A wall remains until the end of the wave or its caster is Defeated, unless destroyed sooner.
Spell kinds. Some spells and traits refer to each other by kind. An Enchantment is a lasting effect that Break Enchantment can dispel. A Summoning creates a model or effect that vanishes if its caster is Defeated, and that Unsummon can remove. A Wall is a summoned barrier as described above. A Resisted spell lets its target roll one Quality die per point of Power to avoid it, any failure meaning the spell takes hold. A spell that affects only living targets has no effect on Undead or Artificial models. A Ritual spell is cast as a Task of the stated number of actions rather than in one activation.
Conditions. A condition lasts until something removes it. Beyond Defenseless, Transfixed, and Entangled above:
| Condition | Effect |
|---|---|
| Wounded | A Tough model's Quality has worsened by 1 per wound. At Q7+ it is Defeated. |
| Poisoned | The model's Quality has worsened by 1. No model can lose more than 1 Quality to poison in a turn. At Q7+ it is Defeated. |
| Cursed | The model must reroll every Combat or Quality die that shows a 6 and keep the second result. While Cursed it cannot use any rule that grants a reroll. |
| Blinded | −1 Combat and −1 on Quality rolls until the end of the model's next activation. |
| Sleeping | The model cannot act. Attacks against it are at +2 and are Lethal. It wakes if it suffers any attack that does not Defeat it, or if a friend adjacent to it spends one action. |
| Staggering | The model loses one action on its next activation. |
A Healer, a Potion of Healing, or a spell that removes conditions clears one condition per use unless it says otherwise. Wounds are not conditions and are removed only by healing that names them.
3.8 Tough heroes
When a Tough model would suffer a normal Defeated result, give it one Wound instead and worsen its Quality by 1. At Q7+ it is Defeated. A Gruesome Kill still defeats a Tough model. Hero Wounds persist between waves until healing removes them. A Defenseless hero is still on the table; a Defeated hero is removed and can only return through Resurrection.
Set Up the Village
- Choose Intro (5 waves), Standard (7 waves), or Siege (10 waves).
- Choose 2–4 heroes. Each contributes 100 wave points: party value is 200, 300, or 400.
- Set a 3' × 3' battlefield. Place 6–10 terrain pieces, leaving clear routes from each edge to the centre. Decide which pieces are Difficult, Cover, blocking, or impassable.
- Place the Town Hall within 6" of the centre. Place the Forge, Temple, Watchtower, and Stable within 8" of it and at least 3" apart.
- Give each building its starting Integrity and Level I. Start with 0 Supplies. Set Opportunity tokens aside.
| Building | Starting Integrity |
|---|---|
| Town Hall | 6 |
| Forge, Temple, Watchtower, Stable | 3 each |
Start a Wave
5.1 Escalation and budget
Find the wave's Escalation, then multiply party value by the listed percentage. All supported party values produce whole budgets.
| Escalation | Budget | Unlock |
|---|---|---|
| I | 25% | Mobs |
| II | 50% | Torch Bearers |
| III | 75% | Mixed Behaviours |
| IV | 100% | Elites |
| V | 125% | Multiple spawn edges |
| VI | 150% | Bosses |
| VII | 175% | Final Assault |
| Wave | Intro | Standard | Siege |
|---|---|---|---|
| 1 | I | I | I |
| 2 | I | II | I |
| 3 | II | III | II |
| 4 | II | IV | III |
| 5 | III | V | III |
| 6 | — | VI | IV |
| 7 | — | VII | V |
| 8 | — | — | VI |
| 9 | — | — | VII |
| 10 | — | — | VII |
5.2 Build Enemy Groups
The Bestiary is the enemy roster; its printed Wave Points are used here.
- Check the Escalation limits. At Escalations I–II, choose Mobs only. At IV+, a Group may include one Elite alongside Mobs. At VI–VII, the first Group must contain one Boss. At VII, use at least three Groups and at least two different Behaviours.
- For each new Group, choose an enemy profile from the Bestiary. The Group uses the Behaviour printed on that profile; a profile listing two Behaviours may use either. Before Escalation III, choose one Behaviour for the whole wave and build every Group from profiles that use it; from Escalation III on, each Group may use a different Behaviour.
- Roll a D6 for the number of models: 1–5 gives that many; reroll 6. Add models one at a time, stopping before their total would exceed the remaining budget. A Group must contain at least one model; if none fits, choose a cheaper profile or stop building the wave.
- Repeat until no eligible model fits. Number Groups in the order created. At II+, these profiles may ignite buildings: Blazing Skeleton, Chaos Zealot, Fire Entity, Goblin Looter, Infernal Imp, Kobold Skirmisher, Orc Demolisher, and Orc Warrior.
- Roll a spawn edge for every Group. At V+, use at least two different edges if there is more than one Group.
For a random edge, assign 1–4 clockwise around the table and roll a D6; reroll 5–6. Enemy spawn edges stay hidden until enemies deploy unless Watchtower III reveals them.
5.3 Start-of-wave sequence
Once the wave is built, resolve these steps in order:
- Wave-start abilities that add or choose models. Town Hall III deploys up to two absent Village Archers; Stable III deploys up to two absent Village Riders; Stable II chooses its Warhorse hero (§7.3).
- Deploy the defenders. Place all heroes and Village Defenders within 6" of the Town Hall — or within 6" of any village building if Watchtower III is active.
- Deploy the enemies. Reveal spawn edges (with Watchtower III they were revealed before hero deployment) and deploy each Enemy Group wholly within 6" of its edge, outside Short of a hero where possible.
- Ready Mounts. With Stable I, move one hero up to Short. This is not an action and cannot enter contact with an enemy.
- Begin. Heroes take the first turn.
Fight the Wave
Each round, take a hero turn and then an enemy turn, following the activation rules in §3.1. The wave ends immediately when every enemy is Defeated or Fled.
6.1 The hero turn
Heroes activate one at a time as in §3.1. Village Defenders also activate during hero turns. They are not heroes: they cannot claim Opportunities or use hero signatures, and have no Wound track.
Claiming an Opportunity. An Opportunity token placed at the end of an earlier wave (§7.1) waits outside the village, face down unless Watchtower II revealed it. A hero in base contact spends one action to reveal and claim it, then resolves the result below. Claiming ends that movement unless the hero's signature ability says otherwise. An unclaimed Opportunity remains until claimed; remove all unclaimed tokens when the game ends.
| D6 | Opportunity | Effect |
|---|---|---|
| 1 | Ambush | Immediately build a Group worth up to 25% of the wave just completed's budget; deploy it at the nearest edge. It activates on the next enemy turn. |
| 2 | Supply Cache | Gain 2 Supplies immediately. |
| 3 | Healing Herbs | Gain one Herb token; spend it in a Council Phase to heal one Wound. |
| 4 | Repair Materials | In the next Council Phase, repair 1 Integrity for free. |
| 5 | Lost Villager | Place a villager. A hero adjacent to it may spend one action to escort it; it moves with that hero. When it reaches the Town Hall, gain 3 Supplies. If its hero becomes Defenseless or moves away, leave it in place. |
| 6 | Ancient Relic | Gain 3 Supplies immediately. |
6.2 The enemy turn
Activate eligible Enemy Groups in Behaviour play order: Fanatic, Ravager, Hunter, Raider, Mindless, then Guardian. Break a tie by lower Group number. A Group rolls once using its worst Quality; every model in it receives the same number of actions. Complete one model before the next. Two failures end the enemy turn after any successes are used. Exception: a Mindless or Guardian Group receives at most one action per activation and never causes a turnover — on two failures it simply receives no action.
For each action, use this universal priority:
- If Engaged, make a melee attack against the Behaviour's preferred target; otherwise attack the adjacent target that is nearest to the Group's goal.
- Identify the Behaviour's target and move by the shortest legal route toward the required position.
- If the target becomes attackable and an action remains, attack it.
- If no preferred target exists, use the Behaviour's fallback. If no useful action is possible, lose the action.
When routes or targets tie, choose in this order: closest to the Town Hall, lowest current Integrity, most Wounds, lowest Combat, then lowest Group number. If still tied, roll a D6.
6.3 Behaviours
Ravager. Target: the nearest undestroyed building; on a tie, the lowest Integrity. In melee: if adjacent to its building, attack it; a hero is attacked only if it blocks the route or is the only adjacent target. Fallback: if every building is Destroyed, use Hunter.
Hunter. Target: the nearest hero; on a tie, the hero with most Wounds, then the universal tie-breaker. In melee: attack that hero when Engaged. Fallback: if no hero remains, target the nearest Village Defender, then the Town Hall.
Raider. Target: the nearest intact Forge or Stable; on a tie, Forge. In melee: attack that building until it is Destroyed, then move by the shortest route to the nearest table edge and leave it; attack a blocking or Engaged hero only until it can resume the route. Fallback: if both economic buildings are Destroyed, leave by the nearest edge.
Mindless. Target: the nearest hero, Village Defender, or undestroyed building. In melee: attack the nearest adjacent target. Limits: it never voluntarily disengages or makes a ranged attack or spell attack.
Fanatic. Target: the Town Hall. In melee: attack it when adjacent; attack a hero only if the hero blocks its route or is Engaged. Limits: Fanatics ignore voluntary retreat and do not make morale checks for Terror or Gruesome Kills.
Guardian. Target: on deployment, assign the Group its nearest building; if an Opportunity is nearer, assign that instead. Move until within 3" of it. In melee: while within 3", attack heroes or Village Defenders that come within 3"; do not pursue farther. Fallback: if the objective is Destroyed or removed, assign the nearest remaining building; if none remains, use Hunter.
6.4 Attacking buildings, and fire
Buildings are solid objectives, not playable interiors. Models cannot enter, stand inside, or fight from a building unless a scenario says otherwise. Defending doors, windows, and walls is represented by adjacent models, Cover, Barricades, and building upgrades.
Buildings do not activate, move, attack, make morale checks, Recoil, or become Defenseless. An adjacent enemy may spend one action to make a structural attack. Roll the attacker's D6 + Combat against the building's D6 + Structure 3. If the attacker has Big, Huge, or Heavy Weapon, add +1 Combat to this roll; this bonus does not stack. Do not use the normal combat result table. Buildings gain no outnumbering penalty.
If the attacker ties or loses, no damage is dealt. On a win, reduce Integrity by 1. Enemy Behaviours make one normal building attack per action; they use Power Blow only if a profile, scenario, or special rule says so. A winning Power Blow reduces Integrity by 2 instead. Traits that explicitly add building damage apply after this result. At 0 Integrity, remove any fire token and mark the building Destroyed; it loses its ability and cannot be repaired or upgraded. Destroying the Town Hall ends the game immediately.
Example — a building attack: A C3 Orc Demolisher with Heavy Weapon attacks a Forge. It rolls 4, for 8 after Combat and the Heavy Weapon structural bonus. The Forge rolls 3, for 6 after Structure. The Forge loses 1 Integrity.
Fire. A Torch Bearer adjacent to an intact building may spend one action to place one fire token on it instead of attacking. A building can hold only one fire token. Fires burn until the end of the wave: heroes may extinguish them then, and each building still burning loses 1 Integrity (§7.1). Fire damage uses the same destruction rule as above but is not prevented by Cover or combat traits.
6.5 Barricades and Traps in play
Barricades and Traps are placed during the Council Phase for 1 Supply each (§7.2).
A Barricade is a 3" linear obstacle with Integrity 2 and Structure 2, placed within 3" of a village building. It gives Cover to a model immediately behind it and uses the structural attack procedure. A Destroyed Barricade is removed. Models cross an intact Barricade using the linear-obstacle movement rule; Flying models ignore it.
A Trap is placed face down within 6" of a village building. The first enemy entering its 2" area triggers it; resolve its effect, end that model's movement, then remove the Trap.
| D6 | Trap result |
|---|---|
| 1–3 | An ordinary enemy becomes Defenseless. A Tough enemy suffers one Wound instead. |
| 4–6 | An ordinary enemy is Defeated. A Tough enemy suffers two Wounds instead. |
End the Wave
7.1 End Sequence
When no enemy remains, resolve this sequence in order:
- Extinguish fires. Each hero adjacent to a burning building may extinguish its fire; each hero can extinguish one fire.
- Fire damage. Every still-burning building loses 1 Integrity. If the Town Hall is destroyed, the players lose.
- Supplies. Gain Supplies equal to the wave number.
- Rewards. Resolve any claimed Opportunity that says it happens at wave end.
- Place an Opportunity. If this was not the final wave, place one Opportunity token outside the village, on a random edge and at least 12" from the Town Hall if possible. Keep it face down unless Watchtower II is active. It is claimed during play (§6.1).
- Council. Resolve the Council Phase (§7.2).
7.2 Council Phase
After every non-final wave, resolve Council actions in any order. Players may spend Supplies to repair (Forge), upgrade buildings, place Barricades and Traps for 1 Supply each (§6.5), and use healing (Temple, Herb tokens). A building cannot exceed its starting Integrity. Destroyed buildings cannot be repaired or upgraded.
| Upgrade | Cost |
|---|---|
| Level I to II | 4 Supplies |
| Level II to III | 6 Supplies |
7.3 Buildings and Upgrades
Each ability is tagged with when it is used: (Council) during the Council Phase, (Wave start) in the start-of-wave sequence (§5.3), (Wave) during play, or (Passive) always.
Town Hall
- I — Heart of the Village (Passive): If the Town Hall is Destroyed, the players lose immediately.
- II — Engineering Corps (Council): Each Council Phase, choose one: repair 1 Integrity for free, or place one Barricade for free.
- III — Village Militia (Wave start): Deploy up to two absent Village Archers within 6" of the Town Hall. Do not add replacements while both are in play.
Forge
- I — Repairs (Council): Spend 1 Supply to restore 1 Integrity.
- II — Master Craftsmen (Council): Each Supply spent on repairs restores 2 Integrity instead of 1.
- III — Reinforced Defenses (Council): Once each Council Phase, one Barricade placed this phase gains +1 starting Integrity.
Temple
- I — Healing (Council): Once each Council Phase, heal 1 Wound from one hero.
- II — Blessing (Wave): Once per wave, before an enemy activation begins, choose one building. It ignores all Integrity damage from that activation, including fire caused during it.
- III — Resurrection (Council): Once per game during a Council Phase, return one Defeated hero within 3" of the Temple with three Wounds (Q6+ for the supplied Q3+ heroes).
Watchtower
- I — Overwatch (Wave): Once per wave, before a hero within 3" makes a ranged attack, give that attack +1 Combat.
- II — Scouts (Passive): Reveal an Opportunity when it is placed.
- III — Advanced Deployment (Wave start): Reveal spawn edges before hero deployment; heroes and Village Defenders may deploy within 6" of any village building.
Stable
- I — Ready Mounts (Wave start): After both sides deploy, move one hero up to Short. This is not an action and cannot enter contact with an enemy.
- II — Warhorse (Wave start): Choose one hero. It has Long Move for that wave.
- III — Rider Militia (Wave start): Deploy up to two absent Village Riders within 6" of the Stable. Do not add replacements while both are in play.
Village Archers and Village Riders are Village Defenders; they activate during hero turns and follow the rules in §6.1.
| Defender | Profile | Traits |
|---|---|---|
| Village Archer | Q4+ / C2 | Short Bow |
| Village Rider | Q4+ / C2 | Long Move, Mounted |
Reference
8.1 Traits
Use only traits printed on supplied profiles. Effects that refer to a Wound apply only to Tough models; an ordinary model is Defeated where the effect says it suffers a normal kill.
| Trait | Rule |
|---|---|
| Animal | Cannot use weapons or items. It is removed if its last non-Animal ally or last Beastmaster is Defeated. |
| Artificial | Immune to Poison. Treat a Gruesome Kill as a normal Defeated result; ignore Terror and Gruesome-Kill morale. |
| Backstab | Its Ambush bonus (§3.4) is +2 instead of +1. |
| Battle Hunger | After rolling two or more activation dice, it may increase one die by 1. |
| Beastmaster | Friendly Animals within Long gain +1 on activation and morale Quality rolls. |
| Big / Huge | +1 Combat in melee against smaller models and on structural attacks; ranged attacks against it gain +1 Combat. Huge is larger than Big. |
| Block / Expert Block | After suffering Recoil, Defenseless, or Defeated in combat, roll D6: on 5+ (4+ for Expert), lessen it one step. No effect on Gruesome Kills, spells, magic attacks, or Free Hacks. |
| Clinging | May move on walls and trees. It takes no falling damage from becoming Defenseless while climbing. |
| Coward | −1 on morale Quality rolls. |
| Demon | Holy effects affect it; it suffers −1 Quality and Combat on sacred ground (within Short of an intact Temple). |
| Dim-Witted | Cannot cast spells or use leadership traits. |
| Dragon Ale Flamethrower | Ranged C4 attack against one target within Short, or fixed C2 against all targets under a small teardrop template. Good Shot applies only to the single-target attack. |
| Drain | When it causes Recoil or Defenseless in melee, it may worsen the target's Quality by 1 instead. |
| Ensnare | Spend one action against an Engaged foe: it cannot leave melee, is attacked at +1, and cannot use Block, Parry, Flying, or Free Disengage. No effect on Big or Huge foes. |
| Entangle | Spend 1-3 actions to target a model at Short / Medium / Long. It rolls that many Quality dice; any failure makes it Entangled (§3.7). |
| Fear Aura | Non-Demons and non-Artificial models within Short suffer −1 on morale Quality rolls; not cumulative. |
| Fearless | Immune to Terror and Gruesome-Kill morale. |
| Flying | May move over obstacles and models; has Free Disengage against non-Flying foes. |
| Forester | Ignores difficult-terrain penalties in woods and may pass through Wall of Wood. |
| Freeze | A target hit loses one action in its next activation; cumulative with Slow. |
| Good Shot | +1 Combat on ranged attacks. |
| Healer | While adjacent to a living ally, spend actions and roll that many Quality dice; each success heals one Wound or removes one condition. |
| Heavily Armored | After losing combat, may add +1 to its total, only enough to tie. |
| Heavy Weapon | +1 Combat on structural attacks. On a winning natural 6 Power Blow, inflict Defeated; triple still causes a Gruesome Kill. |
| Hero | One activation die is always an automatic success. It also passes any one-die Quality check automatically. |
| Holy | +1 Combat in melee against Undead and Demons; Terror against Demons; immune to Possession. |
| Incorporeal | Non-magical attacks are −2 Combat against it. It moves through obstacles and models; its non-magical attacks cannot cause worse than Recoil. |
| Javelin | Short range. After a move that brings it closer to a target, one may be thrown as a free action. Exhausted on a natural 1. |
| Lead from the Front | May group-activate with up to four others using the worst Quality; those others gain +1 Quality for that activation. |
| Leader | Friends within Long and line of sight gain +1 Quality on activation and morale; does not stack. |
| Lethal | A profile that names a target type defeats that type on any combat win. |
| Long Move | Uses the Long measure when moving. |
| Longbow | Long range, using +1 / 0 / -2 Combat at one / two / three Long measures. |
| Lumbering | All foes have Free Disengage against it. |
| Magic Resistance | Reroll one failed Quality die when resisting a spell. |
| Mounted | +1 Combat versus non-Mounted models and Free Disengage versus non-Mounted, non-Flying foes. |
| Parry | Once per enemy turn after losing melee, roll one Quality die at −1; on success lessen Recoil, Defenseless, or Defeated one step. |
| Poison | On a hit, roll D6; on 5+, worsen the target's Quality by 1 (maximum once per turn). |
| Potion of Healing | Once per game, spend one action to remove conditions as a three-success Healer result; it cannot revive a Defeated model. |
| Possession | Spend three actions to target a visible model within Medium. It resists with three Quality dice and needs two successes; on failure, its controller chooses its next three actions. Holy models are immune. |
| Puny | Cannot Power Blow; attacks against Defenseless foes are only +1 and not Lethal. |
| Reckless | Before activating, it may gain +1 Quality on rolls until next activation; it suffers −1 Combat in that time. |
| Regeneration | When Defeated, roll D6; if less than its Combat, become Defenseless instead. It fails against Gruesome Kills, magic, fire, and while Defenseless. |
| Rock Punch | A recoiling target moves Short, then rolls one Quality die or becomes Defenseless; Big and Huge targets ignore this. |
| Savage | A melee Defeated result against a living non-Artificial model is Gruesome. |
| Shieldbreaker | On a winning natural 6 in melee, may remove the target's Block or Expert Block for the game instead of applying the result. |
| Short Bow | Medium range, and +1 Combat within Short. |
| Short Move | Uses the Short measure when moving. |
| Skeletal | Non-magical ranged attacks against it are −2 Combat. |
| Slow | May make only one movement per turn, except when fleeing. |
| Spell-caster | May cast the spells printed on its profile. See §3.7 and the Spells reference (§8.2). |
| Stealth | While adjacent to Cover, cannot be targeted by non-magical ranged attacks. |
| Swarm | Counts as Animal and suffers −2 Combat from non-magical ranged attacks. |
| Terror | A model must pass a one-die Quality test to move into melee with it; a model it charges checks morale. Artificial, Fearless, Terror, and Undead models are immune. |
| Thief | Spend one action while in melee contact with a model carrying Supplies or a scenario object. Both sides roll three Quality dice; if the Thief scores more successes, it steals one carried item or 1 Supply. On a tie nothing happens; if the victim wins, it may immediately make a Free Hack. |
| Throw Rock | Medium-range thrown attack. Against a group, resolve two Combat 3 attacks against two randomly chosen targets. |
| Tough | A normal Defeated result becomes one Wound; see §3.8. |
| Traps | +1 on Quality checks to spot or defuse a Trap and +1 Combat when avoiding a trap attack. |
| Undead | Immune to Terror, Poison, and living-only effects; see §3.6 for morale. |
| Unruly | Never receives a Leader or Beastmaster activation bonus. |
| Veteran Group Fighter | Ignores the outnumbered melee penalty. |
8.2 Spells
| Spell | Effect |
|---|---|
| Blast | Ranged spell attack at Combat = Power; ignores Incorporeal and Swarm penalties. |
| Courage | Friends in range gain Fearless until end of turn; Cowards do not benefit. |
| Curse | Target resists with one Quality die per Power. On any failure, it rerolls every Combat or Quality die showing 6 until caster is Defeated or wave ends. |
| Fear | Living target resists with one Quality die per Power; on any failure it immediately checks morale. |
| Fireball | Short-range area fire attack at Combat = Power + 1. |
| Frostbite | Ranged ice attack with Combat equal to Power. If the target is Slowed or reduced to Short Move, Combat is Power + 1 instead. A model damaged by it is also affected by Brittle, the Ice Mage's signature ability (see the Hero Compendium). Backfire: the caster takes a C1 ice attack. |
| Flame Jet | Fire attack at Combat = Power + 1; may ignite flammable terrain. |
| Holy Light | Ranged attack at Combat = Power + 2, only against Demons and Undead. |
| Rain / Snowstorm | Until wave end, ranged attacks are −1 Combat and cannot exceed the spell's Power range. |
| Raise Zombie | Place one Q4+ / C2 Zombie with Slow and Undead in base contact with the caster. It activates as a friendly model, only one raised Zombie may be in play per caster, and it leaves at wave end. |
| Slowdown | Target resists as Curse; on failure it gains Slow or Short Move, caster's choice, until wave end. |
| Summon Warrior | Spend Power 1/2/3 to place one friendly Mob worth up to 30/50/100 points adjacent to the caster. It activates from the next friendly turn and leaves at wave end. |
| Wall of Bones | Create a climbable, line-of-sight-blocking wall. Each time it would take damage, ignore it on 5+. |
| Wall of Fear | Create a line-of-sight-blocking nonphysical wall. Living models within or entering Short resist or check morale. |
| Wall of Fire | Create a burning wall. Crossing it causes a Combat = Power + 1 fire attack; shots through it are −1 Combat. |
| Wall of Holy Light | Create a wall Demons cannot cross; shots through it are −1 Combat. |
| Wall of Ice | Create an unclimbable, line-of-sight-blocking wall. A Fireball or adjacent Wall of Fire destroys it. |
| Wall of Wood | Create a climbable, line-of-sight-blocking wall; Foresters pass freely. Fire may turn it into Wall of Fire. |
| Rimeguard | Choose a point within range; enemies treat ground within Short of it as Difficult Terrain until wave end. |
8.3 Glossary
| Term | Meaning |
|---|---|
| Active / Activated | A model that has not / has completed an activation in its side's current turn. |
| Ambush | A +1 Combat bonus for an attacker that began the turn fully hidden from its target (§3.4). |
| Blinded | −1 Combat and −1 on Quality rolls until the end of the model's next activation. |
| Combat die | The number showing on a model's D6 before Combat and modifiers are added. It decides Recoil versus Defenseless, never the multiplier. |
| Cursed | Must reroll every Combat or Quality die showing a 6 and keep the second result; cannot use any rule granting a reroll. |
| Defensive roll | A roll that can stop an attacker from winning but can never inflict a result of its own. Used by the target of a Free Hack and by the target of every ranged attack. |
| Free Hack | An attack that carries no risk for the attacker; its target makes a defensive roll. |
| Building | A fixed village structure with Integrity. |
| Defeated | Removed from the current game. |
| Enemy Group | One to five enemies with one Behaviour, spawn edge, activation roll, and Group number. |
| Engaged | In base contact with an enemy. |
| Defenseless | Knocked down but still in play. It normally spends one action to stand. |
| Fled | Left the table because of morale or a Behaviour. It counts as Defeated for ending a wave. |
| Hero | A player-controlled model from the Hero Compendium. Every hero is Tough. |
| Integrity | Damage capacity. A building, Barricade, or wall at 0 Integrity is Destroyed. |
| Opportunity | An unknown token beyond the village that a hero can claim. |
| Poisoned | Quality worsened by 1. No model loses more than 1 Quality to poison in a turn; at Q7+ it is Defeated. |
| Signature | A hero's unique ability, printed with that hero in the Hero Compendium. |
| Sleeping | Cannot act; attacked at +2 and Lethally. Wakes on any attack that does not Defeat it, or if an adjacent friend spends one action. |
| Staggering | Loses one action on its next activation. |
| Task | A job needing a stated number of actions (a "2-action Task"). Actions accumulate across turns until the total is spent. |
| Supplies | The resource spent during the Council Phase. |
| Village Defender | A friendly Archer or Rider supplied by a village upgrade. |
| Wounded | A Tough model whose Quality has worsened after a normal kill. |
8.4 Quick Reference
| Procedure | Summary |
|---|---|
| Wave start | Budget → build Groups → wave-start abilities → deploy heroes → deploy enemies → Ready Mounts → hero turn first. (§5) |
| Hero turn | Activate models; 1–3 dice; successes are actions; two failures end the turn. (§3.1) |
| Enemy turn | Fanatic → Ravager → Hunter → Raider → Mindless → Guardian. Each Group rolls once and all members receive the same actions. (§6.2) |
| Combat | Roll D6 + Combat each. Higher wins: defender die odd = Recoil, even = Defenseless; double = Defeated; triple = Gruesome Kill. (§3.4) |
| Wave end | Extinguish fire → fire damage → gain wave-number Supplies → rewards → place Opportunity → Council. (§7.1) |
| Council | Spend Supplies on repairs, upgrades, Barricades, Traps, and healing. (§7.2) |